
How to Install a Shorty Header: Step-by-Step Guide for Enthusiasts

Introduction
Imagine gearing up for an exhilarating journey to boost your vehicle's performance, only to face the daunting challenge of installing shorty headers. This game-changing upgrade can supercharge your ride, unleashing a wave of power and efficiency that you can feel! Yet, as many enthusiasts dive into the details, confusion often sets in, leaving them feeling lost and frustrated. But fear not! By following this step-by-step guide, you’ll uncover the tools, materials, and techniques necessary for a successful installation.
However, what happens when unexpected challenges arise during the process? Mastering the art of troubleshooting can transform your upgrade from a potential nightmare into a thrilling success story.
Gather Necessary Tools and Materials
Imagine gearing up for an exciting performance upgrade on your vehicle, only to realize you’re missing essential tools and materials. It’s a frustrating scenario that many automotive enthusiasts face. You’ve got the passion, the vision, but without the right gear, that dream upgrade can quickly turn into a nightmare.
So, what do you need to ensure a smooth installation process? First off, gather your tools! A socket set with both 3/8” and 1/4” drives is a must, along with a reliable torque wrench, ratchet, and extensions. Don’t forget open-end wrenches, screwdrivers (both flathead and Phillips), and pliers. And here’s a pro tip: spray some penetrating oil, like PB Blaster, on all exhaust manifold, cat converters, and x-pipe fasteners before you start. This little step can save you a world of hassle! Safety is key, so grab your gloves and goggles, and make sure you have jack stands or a vehicle lift ready.
Now, let’s talk materials. Shorty headers from Mace Engineering Group are a fantastic choice, especially when considering high-performance options. Pair those with high-quality gaskets, preferably multi-layer steel or copper, and header bolts if they’re not included with your headers. And don’t forget the anti-seize compound for those bolts!
When you have these tools and materials ready, you’re not just preparing for an installation; you’re setting the stage for an exhilarating transformation of your ride! And don’t forget to take advantage of the 'Your Garage' feature on Mace Engineering Group's website - it’s like having a personal assistant for your automotive upgrades, making sure you get the perfect fit every time! With the right tools and materials at your fingertips, you’ll not only streamline the installation process but also unlock the full potential of your vehicle’s performance.

Prepare Your Vehicle for Installation
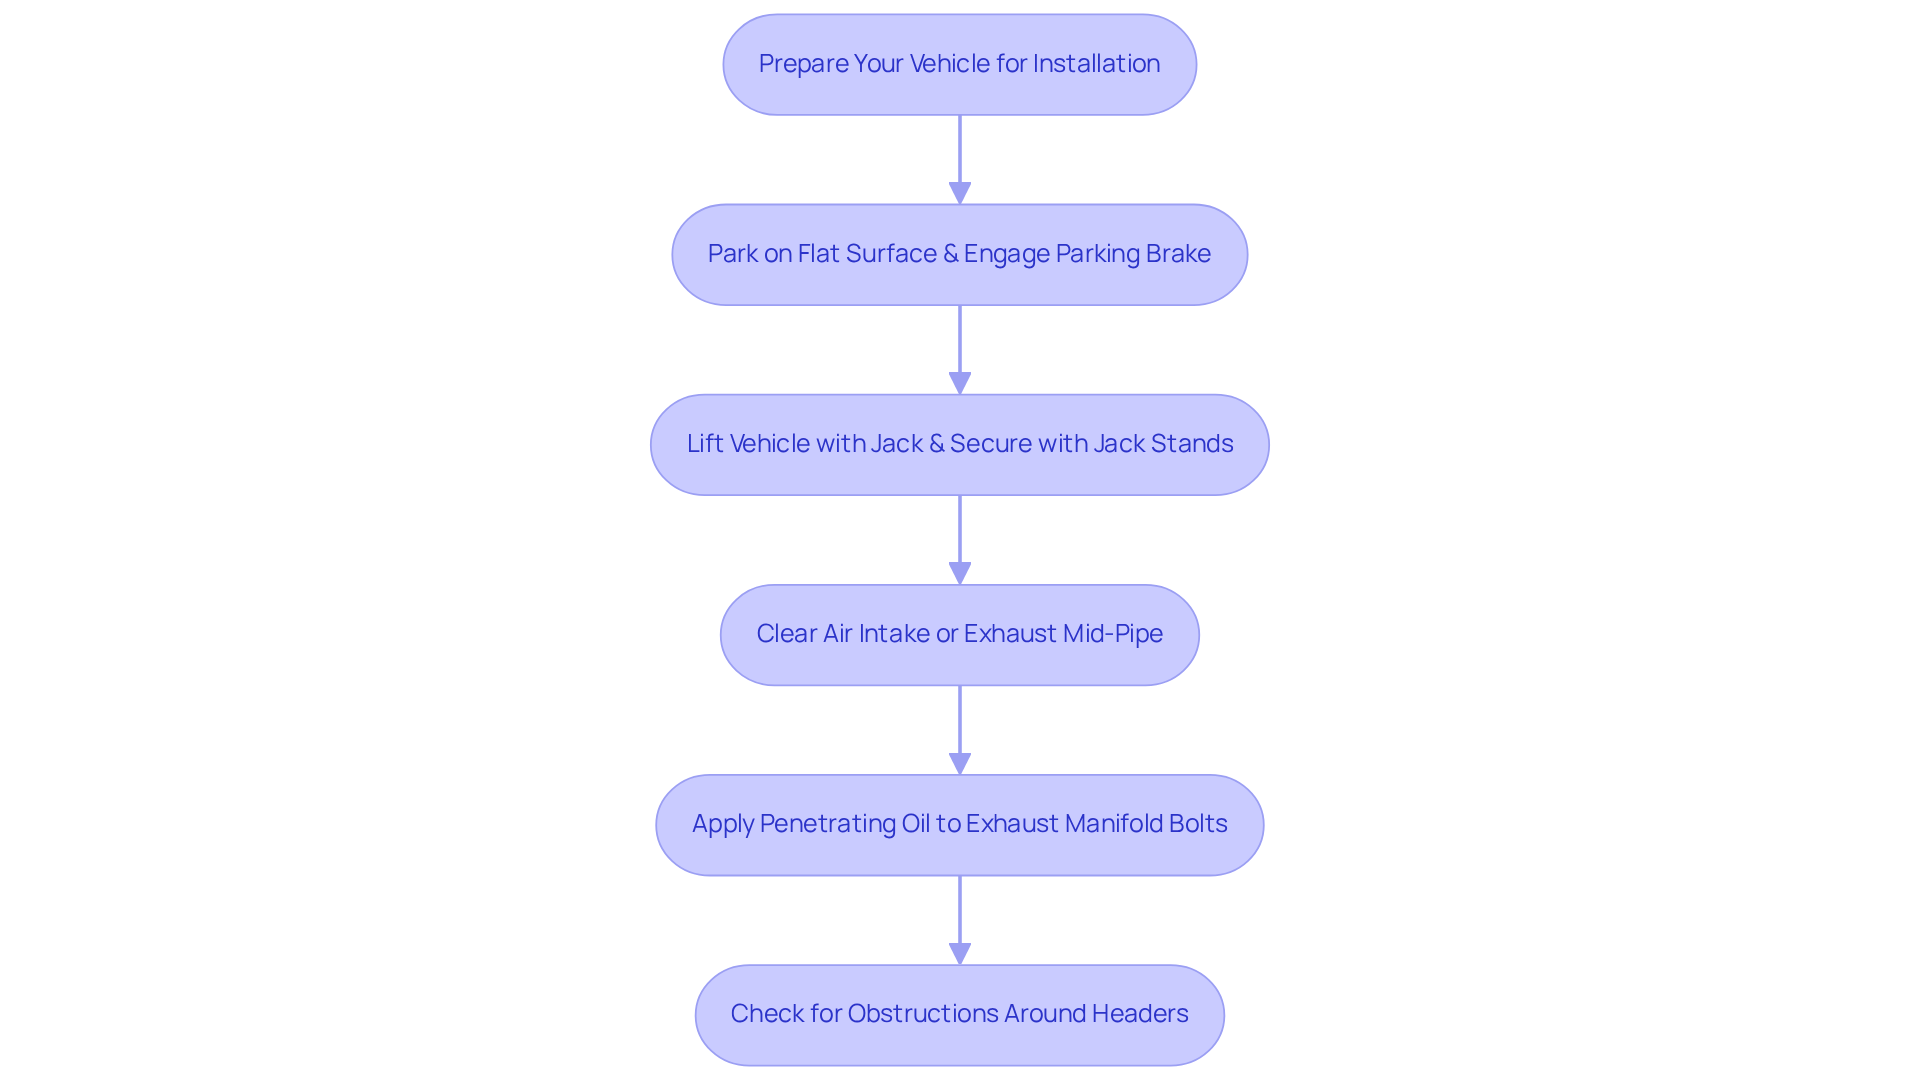
Picture this: you're ready to elevate your car's performance, but without the right preparation, you could be setting yourself up for a frustrating experience. Preparing your car for a shorty header setup is essential for a successful upgrade. Let’s kick things off with safety-because nothing ruins a project faster than an accident! Park your vehicle on a flat, solid surface and engage that parking brake-trust me, you don’t want your ride rolling away while you’re in the zone.
Now, grab your trusty jack and lift the front of your vehicle-then secure it with jack stands, ensuring you’re all set for the exciting work ahead! Depending on your ride, you might need to clear out the air intake or exhaust mid-pipe-think of it as making space for the real magic to happen.
Next, give those stubborn exhaust manifold bolts a spritz of penetrating oil-this little trick will make loosening them a breeze! And don’t forget to take a moment to check around the headers-make sure nothing’s in the way of your upgrade adventure!
By following these preparation steps, you’re not just preparing for an installation; you’re paving the way for a thrilling driving experience that you’ll love every time you hit the road.
Install the Shorty Header
Ready to unleash your vehicle's true potential? Installing short exhaust manifolds is your ticket to a thrilling ride! With your automobile prepared and tools ready, let’s dive into the steps that will elevate your driving experience.
- Say goodbye to those old headers that have held you back! If applicable, unbolt and remove the old exhaust manifolds. Keep track of all bolts and gaskets for reference. Be cautious, as installing components may void your vehicle's warranty.
- Get ready to seal the deal with fresh gaskets that promise a leak-free performance! Place the new gaskets onto the engine’s exhaust ports. Ensure they are aligned correctly to prevent leaks. Cleaning the gasket surfaces thoroughly is crucial for a proper seal.
- Now, let’s position those shorty headers professionally, ready to transform your ride! Carefully position the shorty header over the gaskets. Align the top flanges with the exhaust ports.
- Tighten those headers with confidence, knowing you’re enhancing your vehicle’s power! Start by hand-tightening the header bolts to hold the headers in place. Utilize a torque wrench to secure the fasteners to the manufacturer's specifications, ensuring uniform pressure across the assembly. Consider using Stage 8 fasteners for enhanced protection against loosening caused by vibration.
- Reconnect everything with care, ensuring your ride is ready for the road ahead! Reattach any components that were removed during the preparation phase, such as the steering shaft or exhaust mid-pipe. Ensure all connections are secure.
- Take a moment to double-check your work; this is where the magic happens! Before lowering the vehicle, double-check that all bolts are tightened and that there are no loose components. It’s advisable to retighten the bolts after a couple of weeks of driving, as they may loosen over time.
- Lower your vehicle with excitement, knowing you’ve just made a powerful upgrade! Carefully lower the vehicle back to the ground and reconnect the negative battery terminal.
By following these steps, you will successfully install your short exhaust components, enhancing your vehicle's performance. With your new setup, every drive will feel like a race, so keep an eye on those fasteners and enjoy the journey!

Troubleshoot Common Installation Issues
Imagine the thrill of revving your engine, only to be met with the frustrating sound of exhaust leaks - what a letdown! If you find yourself in this situation, first check those header bolts for tightness! One user discovered that securing the fasteners attaching the flange to the block can make a world of difference. Re-torque them if necessary and ensure that the gaskets are properly seated and undamaged.
Picture this: you’re ready to hit the road, but your headers just won’t align! Misalignment can happen due to pesky obstructions. Take a moment to inspect for any nearby components that might be getting in the way. Loosening adjacent parts can often create the necessary clearance for that perfect alignment.
Nothing ruins the joy of driving like those strange noises or vibrations - could it be loose bolts? If you’re experiencing unusual sounds, it’s time to reassess all connections. Make sure those headers are securely fastened and properly aligned. As one user mentioned, checking for loose bolts or gasket issues is crucial, as these can lead to further complications.
And if that dreaded check engine light pops on, don’t panic! It might just be a disconnected sensor or an exhaust leak. Some users have reported that the check engine light turned off after about five days, but concerns about its potential return remain. Grab an OBD-II scanner to diagnose the issue and take the right corrective measures.
Feeling the heat? If things are getting too toasty near those headers, it’s time to take action! Ensure that heat shields are correctly installed and that there’s enough clearance from surrounding components to prevent overheating. If you encounter excessive heat, it may suggest setup errors that require your attention.
By understanding these common issues and their respective solutions, you can facilitate a successful installation and fully enjoy the performance enhancements that your new shorty header provides, leaving you grinning from ear to ear!

Conclusion
Imagine feeling the rush of power as you hit the gas, knowing your vehicle is performing at its absolute best after installing shorty headers. By following the outlined steps, you can tackle the installation with confidence and excitement, ensuring a smooth upgrade process that truly transforms your driving experience. This guide empowers you to take control of your vehicle modifications, creating a bond with your ride that makes every drive feel like an adventure.
Key insights include the importance of thorough preparation, like securing your vehicle and using penetrating oil on stubborn bolts, which can save you time and frustration. Understanding the installation process and being aware of potential issues, such as misalignment or exhaust leaks, equips you with the knowledge to navigate these challenges like a pro! Each step, from removing old headers to ensuring proper torque on new ones, plays a crucial role in achieving optimal performance, and this knowledge empowers you to turn potential setbacks into triumphs, making the journey all the more rewarding!
Ultimately, upgrading to shorty headers isn’t just about enhancing power; it’s about embracing the thrill of automotive passion. So gear up, embrace the journey of installation, and let your vehicle become a true extension of your passion for performance, ready to conquer the open road like never before!
Frequently Asked Questions
What tools are necessary for a performance upgrade installation on a vehicle?
Essential tools include a socket set with both 3/8” and 1/4” drives, a reliable torque wrench, ratchet, extensions, open-end wrenches, flathead and Phillips screwdrivers, and pliers. Additionally, safety gear such as gloves and goggles, as well as jack stands or a vehicle lift, are important.
What is a helpful tip before starting the installation process?
It is recommended to spray penetrating oil, like PB Blaster, on all exhaust manifold, cat converters, and x-pipe fasteners before starting the installation. This can help prevent complications during the process.
What materials should be gathered for the installation?
For the installation, you should gather shorty headers, preferably from Mace Engineering Group, high-quality gaskets (multi-layer steel or copper), header bolts (if not included with the headers), and anti-seize compound for the bolts.
How can having the right tools and materials impact the installation process?
Having the right tools and materials ready not only streamlines the installation process but also enhances the potential for a successful performance upgrade, ensuring a smoother and more efficient transformation of the vehicle.
Is there a feature that can assist with automotive upgrades?
Yes, the 'Your Garage' feature on Mace Engineering Group's website can help ensure you get the perfect fit for your automotive upgrades, acting like a personal assistant for your projects.
