

Install a Closed Air Intake: Step-by-Step Guide for Car Enthusiasts

Introduction
Imagine revving up your engine, feeling the rush of power as you hit the gas, only to realize that the installation of your new air intake system feels like climbing a mountain!
Upgrading a vehicle's air intake system can significantly enhance performance, and we’re here to break it down step by step, so you can unleash that horsepower and fuel efficiency you’ve been dreaming of!
But what if, in the midst of your excitement, things don’t go as planned? The thought can be nerve-wracking! Understanding the potential pitfalls is key to ensuring your upgrade doesn’t turn into a nightmare!
Gather Necessary Tools and Materials
Imagine gearing up for an exciting upgrade to your vehicle, only to find yourself scrambling for tools and parts at the last minute! To make your installation of the closed air intake system a breeze, gather these essential tools and materials ahead of time:
Tools Needed:
- Ratchet and socket set (10mm and 14mm sockets recommended)
- Flathead and Phillips screwdrivers
- Pliers
- Torque wrench (if specified by the intake kit)
- Hose clamps (if not included in the kit)
Materials Needed:
- Closed air intake kit (make sure it’s compatible with your vehicle model, utilizing Mace Engineering's proprietary YMM filter system for a precise fit)
- New air filter (if not included in the kit)
- Gasket or sealant (if required)
When you’ve got everything lined up, you’ll breeze through the installation and keep the excitement rolling! And don’t forget to disconnect the battery first-trust me, you’ll want to avoid any electrical hiccups! Keeping your air filters clean or swapping them out regularly is key to unleashing your engine’s full potential. Installing a cold air system can enhance fuel efficiency and increase horsepower, making it a valuable upgrade for automotive enthusiasts. And for an even smoother ride, check out the Your Garage feature on Mace Engineering's website-it’s a game changer for finding the perfect fit for your ride!
Remove the Existing Air Intake System
Are you ready to unleash your vehicle's true potential? Safely removing your existing air intake system is the first step toward elevating your ride's performance. Let’s dive into the process!
First things first, ensure your safety. Turn off the ignition and disconnect the negative battery terminal. This simple step prevents any electrical issues that could throw a wrench in your plans.
Next, locate the air intake system. Identify the components, including the air filter, air box, and connecting tubes. Knowing what you’re working with sets you up for success!
Now, let’s get to the exciting part - removing the air filter! Gently loosen the clamps holding your air filter, feeling the anticipation build as you prepare to reveal the heart of your engine. Regular inspections of the air filter are crucial; a dirty filter can choke your engine, leading to a drop in performance. Mace Engineering's proprietary YMM filter mechanism ensures a precise fit and high efficiency, allowing for optimal airflow and engine performance.
Once that’s done, it’s time to detach the air box. Unscrew or unclip it from its mounting points, but be cautious! You don’t want to damage any surrounding components, as that could lead to costly repairs down the line.
Next, disconnect the connecting tubes. Loosen the hose clamps and gently pull them off. If there are any sensors connected, carefully disconnect them as well. Monitoring these connections is essential; improper disconnections can lead to air leaks and performance issues that can significantly affect engine efficiency.
Before proceeding, take a moment to inspect the area. Ensure it’s free of debris and old gaskets - this is your chance to set the stage for a powerful upgrade! Maintaining a clean environment is essential for the best functioning of your new air intake system. Did you know that a pre-cleaning procedure in a two-stage air purifier can eliminate 75-98% of airborne pollutants? It’s a reminder of how vital clean air is for your engine.
By following these steps, you’re not just removing an old system; you’re paving the way for a fresh start with your new closed air intake setup. This upgrade will undoubtedly improve your automobile's performance and efficiency. Mace Engineering Group offers a variety of high-performance air delivery solutions that can further enhance your vehicle's capabilities. With the right air intake system, you’re not just upgrading; you’re transforming your driving experience into something exhilarating.

Install the Closed Air Intake System
Installing a closed air intake can be a game-changer for your vehicle's performance, but it can also feel overwhelming if you're not sure where to start. Follow these steps to ensure a smooth installation and unleash the full potential of your ride!
-
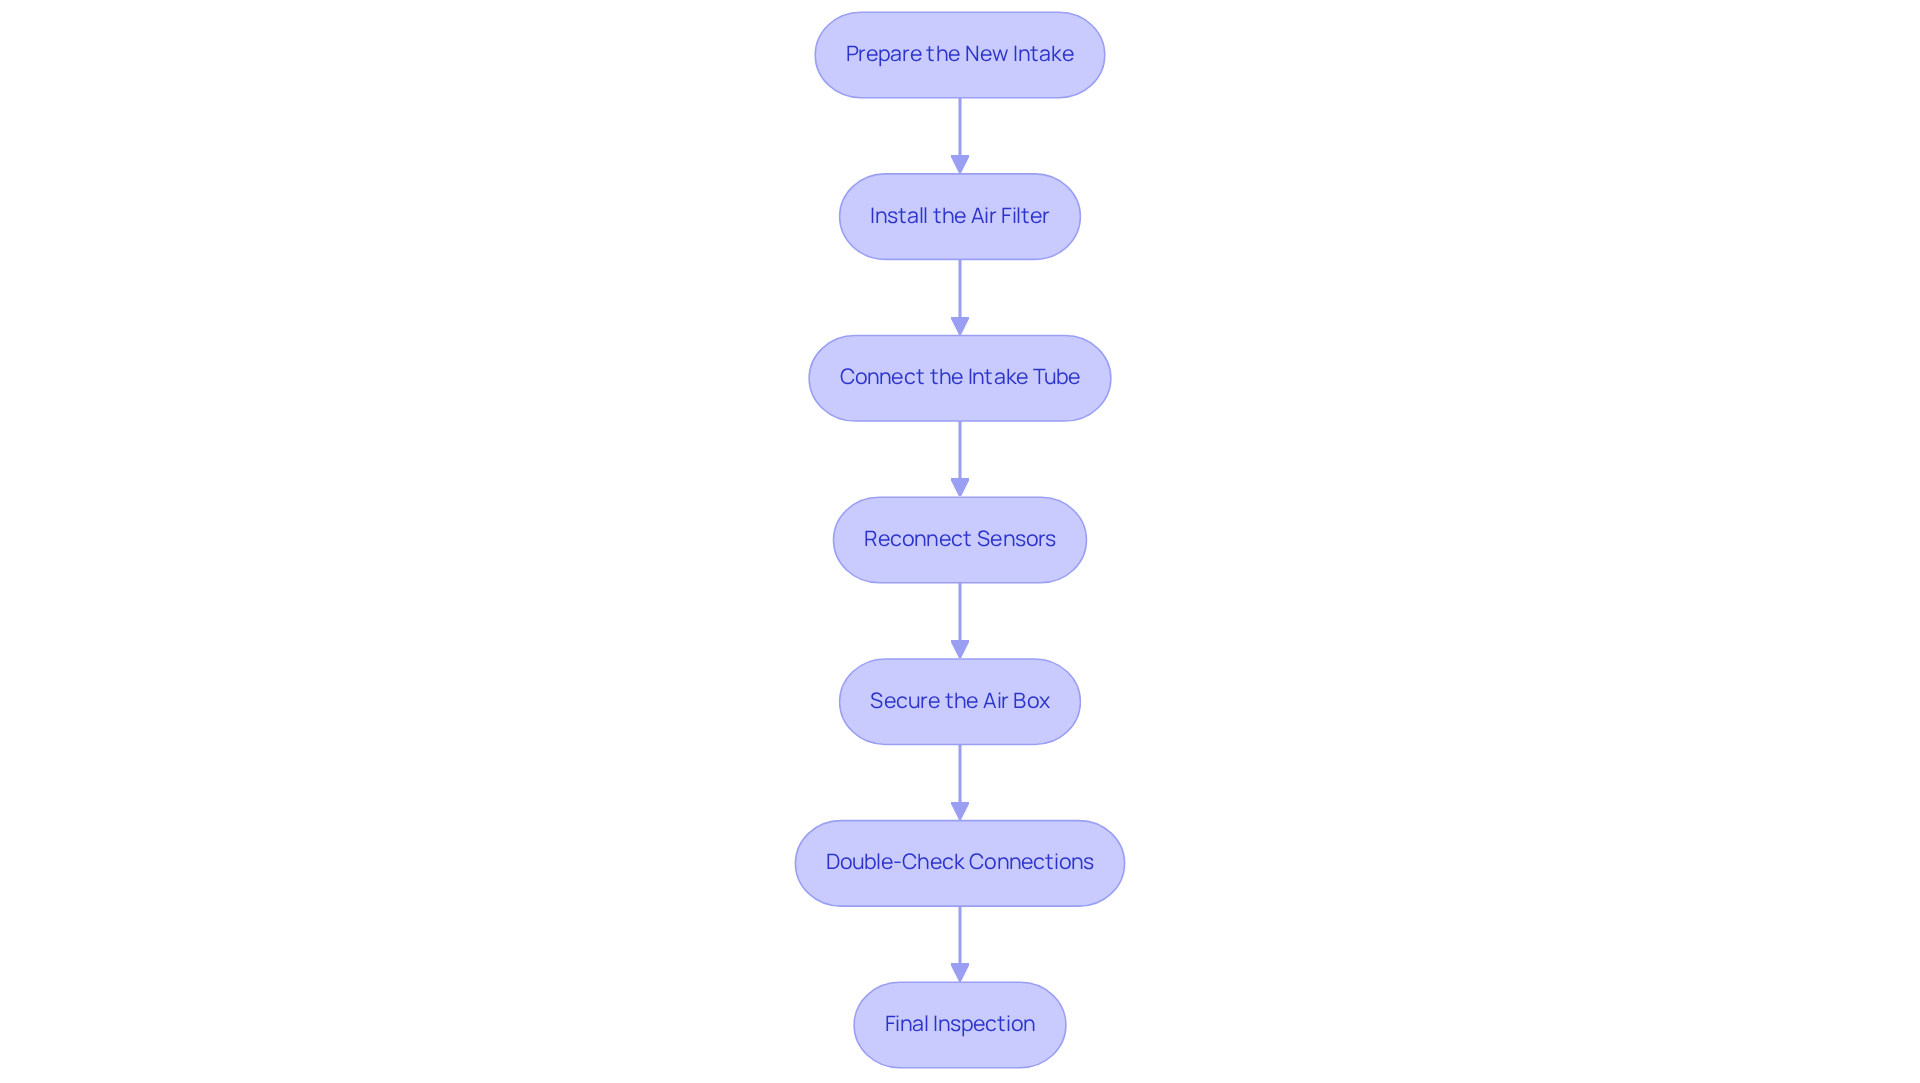
Prepare the New Intake:
- Unbox the closed air intake kit and lay out all components. Make sure you have everything needed for installation, including the proprietary YMM filter system for precise vehicle fitment. This is your first step toward enhancing your vehicle's performance!
-
Install the Air Filter:
- Attach the new air filter to the intake tube, securing it with the provided clamps. Ensure it’s tight to prevent any air leaks. A secure fit here is crucial for optimal airflow!
-
Connect the Intake Tube:
- Position the intake tube in place, aligning it with the throttle body. Secure it using the hose clamps provided in the kit. This is where the magic begins!
-
Reconnect Sensors:
- If your vehicle has sensors that were disconnected during removal, reconnect them to the new intake system as per the manufacturer's instructions. Handle the mass airflow sensor (MAF) with care, as it’s sensitive to vibration, moisture, and contaminants. Getting this right is essential for your engine's health!
-
Secure the Air Box:
- If your new system includes an air box, secure it to the vehicle using the original mounting points and screws. This step ensures everything stays in place as you hit the road!
-
Double-Check Connections:
- Take a moment to double-check all your connections; a tight fit is crucial for optimal performance! Loose clamps or fittings can lead to frustrating issues like erratic idle or sluggish acceleration.
-
Final Inspection:
- Before you close the hood, take a moment to inspect your hard work; ensuring everything is in place is key to unlocking your vehicle's true potential! If low idle or unusual engine behavior persists after several miles, it may indicate an installation issue.
By meticulously adhering to these steps, you’ll successfully install your closed air intake setup, laying the groundwork for enhanced vehicle performance. Remember, installation of an air system can usually be done in 60 minutes or less, making it a favored initial upgrade for automotive enthusiasts. If you need assistance, Mace Engineering Group has a dedicated team of qualified mechanical and automotive engineers available to help. With just a little effort, you can transform your ride into a powerhouse, but remember: every detail matters in this journey to performance excellence.
Finalize Installation and Test Performance
So, you’ve just installed your closed air intake system; now let’s ensure it’s prepared to unleash the power you crave!
-
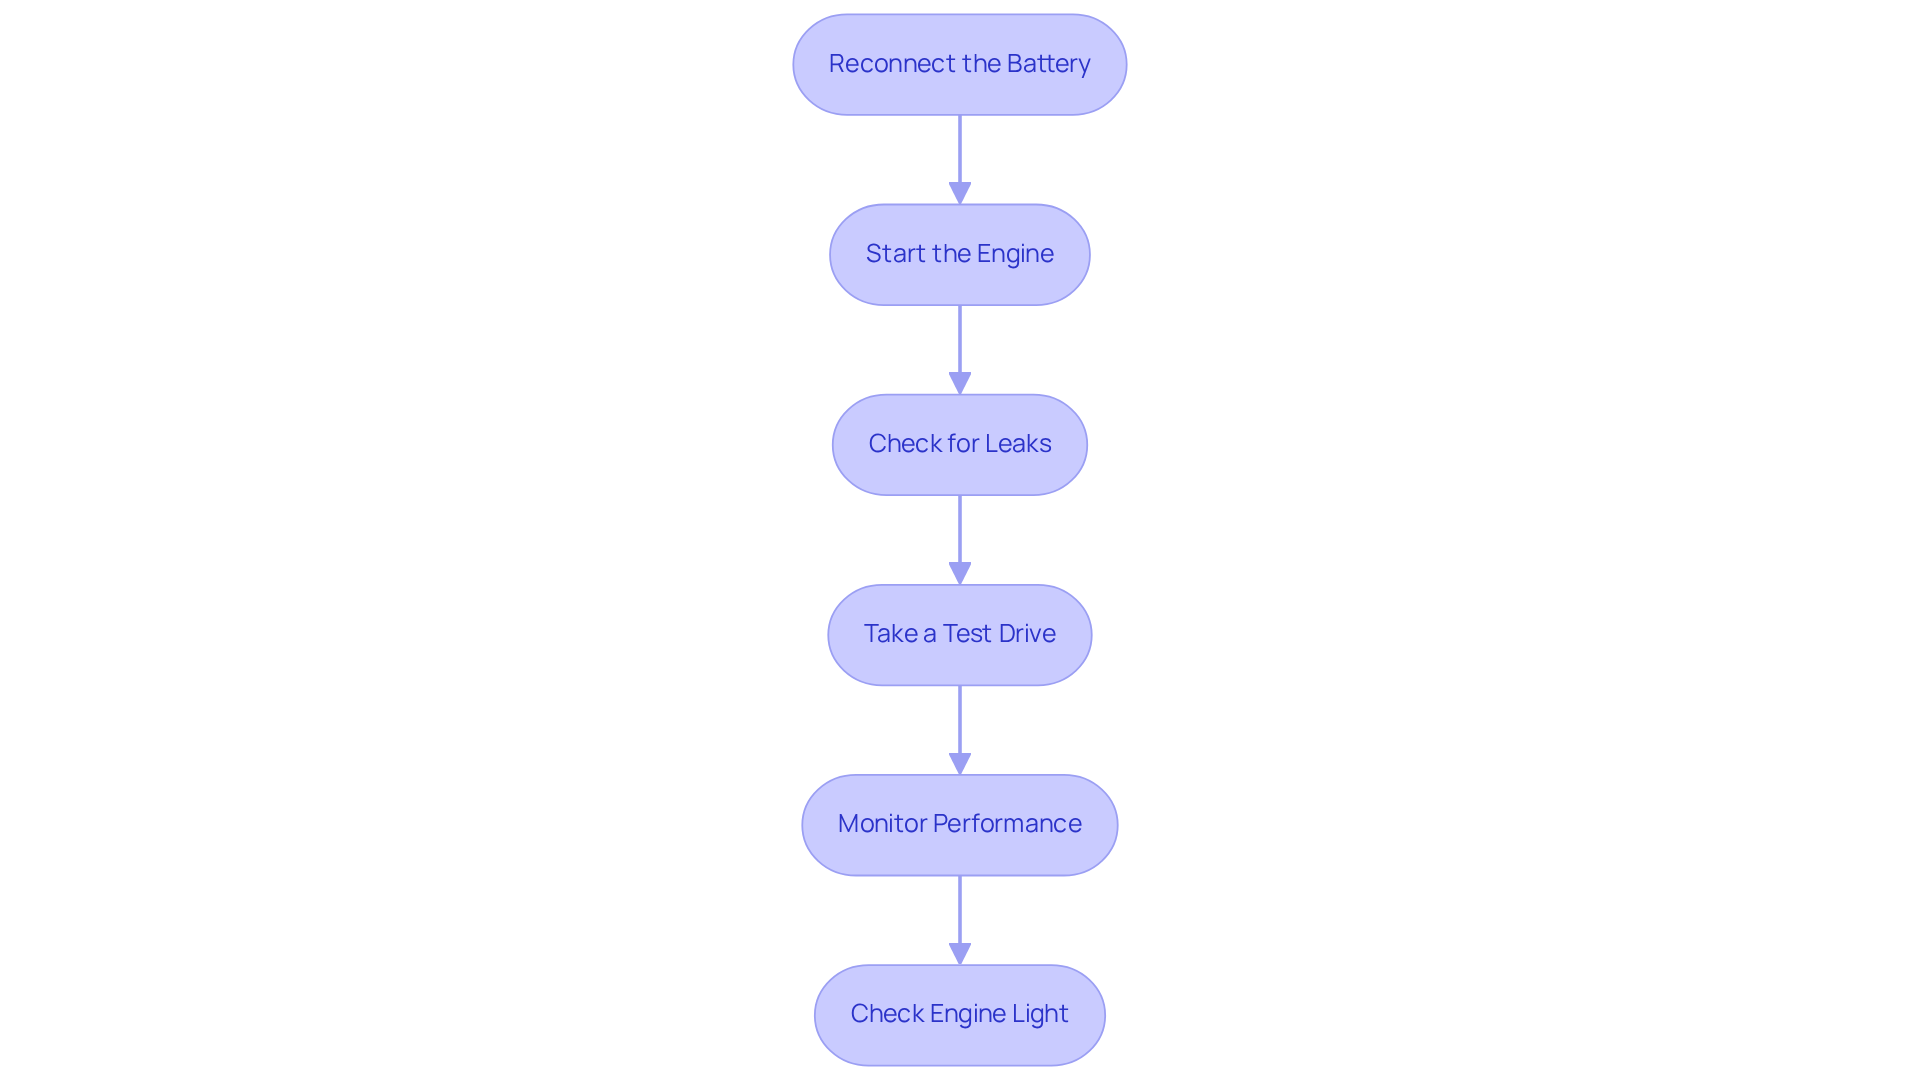
Reconnect the Battery:
- First things first, let’s get that negative battery terminal back in place and make sure it’s snug!
-
Start the Engine:
- Turn on the ignition and fire up the engine. Listen closely for any unusual sounds that might hint at a hiccup in your installation.
-
Check for Leaks:
- Take a moment to inspect all connections for air leaks. If you hear any hissing sounds or feel air escaping, it’s time to recheck those clamps and fittings.
-
Take a Test Drive:
- Hit the road for a short drive to let your engine warm up. Pay attention to how the throttle responds and the overall performance. You’ll be amazed at the difference! For instance, a 500mm long three-inch air duct with a pod filter generated an impressive 95.88kW and 116.4Nm at 7269rpm in a specific test. Just imagine the potential improvements waiting for you!
-
Monitor Performance:
- After your test drive, keep an eye on your vehicle’s performance. You should feel that improved throttle response and maybe even a boost in horsepower. In various tests, different air entry configurations have shown power increases, like a super-long three-inch setup that yielded 104.75kW and 122.28Nm at 4403rpm. The base power measurement without air supply was noted at 99.97kW and 117.4Nm at 7338rpm, giving you a solid benchmark for your improvements.
-
Check Engine Light:
- If that pesky check engine light flickers on, take a moment to revisit your connections, especially the mass airflow sensor-let’s keep everything running smoothly!
By following these steps, you’re not just installing a closed air intake system; you’re unlocking the true potential of your ride, and that’s something to get excited about! For precise vehicle fitment, consider utilizing Mace Engineering's proprietary YMM filter system, and remember that our dedicated team of qualified engineers is here to provide expert technical assistance to help you achieve the best results.
Conclusion
Are you tired of feeling like your vehicle just isn’t living up to its potential? Installing a closed air intake system can be the game-changer you’ve been searching for! By diving into this installation process, you’re not just making a modification; you’re embarking on a journey to unlock your car’s true performance.
Every moment spent on this installation brings you closer to the thrill of a car that truly responds to your every command! From gathering the right tools to safely removing the old air intake, each step is a vital part of the adventure. You’ll feel the excitement build as you prepare the new intake, finalize the installation, and test the performance. This isn’t just about mechanics; it’s about transforming your driving experience into something exhilarating.
So, are you ready to take that first step toward a more exhilarating drive? Embrace the opportunity to unleash your car's true potential and revel in the benefits of improved efficiency and power. Imagine the thrill of unleashing your car’s true power and feeling every exhilarating moment on the road!
Frequently Asked Questions
What tools are needed for installing a closed air intake system?
The tools needed include a ratchet and socket set (recommended 10mm and 14mm sockets), flathead and Phillips screwdrivers, pliers, and a torque wrench (if specified by the intake kit).
What materials are required for the installation?
The materials required include a closed air intake kit (compatible with your vehicle model), a new air filter (if not included in the kit), and a gasket or sealant (if required).
Why is it important to gather tools and materials ahead of time?
Gathering tools and materials ahead of time ensures a smooth installation process without last-minute scrambling, allowing you to focus on the upgrade.
What should you do before starting the installation?
Before starting the installation, it is important to disconnect the battery to avoid any electrical issues.
How can installing a cold air intake system benefit my vehicle?
Installing a cold air intake system can enhance fuel efficiency and increase horsepower, making it a valuable upgrade for automotive enthusiasts.
What feature on Mace Engineering's website can help with finding the right parts?
The 'Your Garage' feature on Mace Engineering's website can help you find the perfect fit for your vehicle.
