
Install Your V8 Turbo Kit: A Step-by-Step Guide for Enthusiasts

Introduction
Transforming a standard vehicle into a powerhouse of performance with a V8 turbo kit is an exciting venture, but it demands meticulous planning and execution. In this guide, I’ll walk you through a detailed step-by-step approach to ensure your installation is a success, from gathering essential tools to fine-tuning the engine for optimal performance.
Many enthusiasts encounter unforeseen issues that can derail their installation efforts. Understanding common pitfalls and how to troubleshoot them is crucial. Without proper troubleshooting, the vehicle's performance may not reach its full potential.
Gather Essential Tools and Materials
Equipping yourself with the right tools and materials is crucial for a successful automotive performance upgrade.
Tools Needed:
- A comprehensive socket set (both metric and imperial) is essential for versatility during installation. Ideally, have both metric and imperial sockets in 3/8in and 1/2in formats for various tasks.
- A torque wrench is crucial for securing bolts to the manufacturer's specifications, ensuring optimal performance.
- A one-metre-long 1/2in breaker bar is recommended for loosening stubborn bolts. Stubborn bolts can pose a challenge, but the right tools make the task manageable.
- You'll need flathead and Phillips screwdrivers for various fastening tasks, and those with soft handles offer a better grip and comfort compared to plastic ones.
- Pliers and wire cutters are important for handling hoses and electrical connections.
- An oil catch pan is recommended for draining fluids safely.
- A coolant drain pan will assist in managing coolant during the setup process.
- Line tools are useful for disconnecting hoses without damage.
- Safety goggles and gloves are essential for personal protection during the setup.
Materials Required:
- The turbo kit should include the turbocharger, manifold, and intercooler, all designed for your specific engine.
- Ensure you have compatible gaskets to prevent leaks.
- Stock up on oil and coolant for refilling after the setup is complete.
- Hose clamps and fittings are necessary for secure connections.
- Electrical connectors may be required based on your performance kit's specifications.
When you have these tools and materials ready, the setup process becomes much smoother, minimizing delays and enhancing your overall experience. For example, Kane Venn, a local enthusiast, successfully installed a performance kit on his modified 1977 HiLux, showcasing the significance of preparation and the right tools in achieving a high-performance upgrade. As Keith Richards aptly stated, "Good tools prevent skinned knuckles, are nicer to hold, and will outlast." By ensuring you have everything ready, you set the stage for a seamless installation and enhanced vehicle performance.

Remove Existing Engine Components
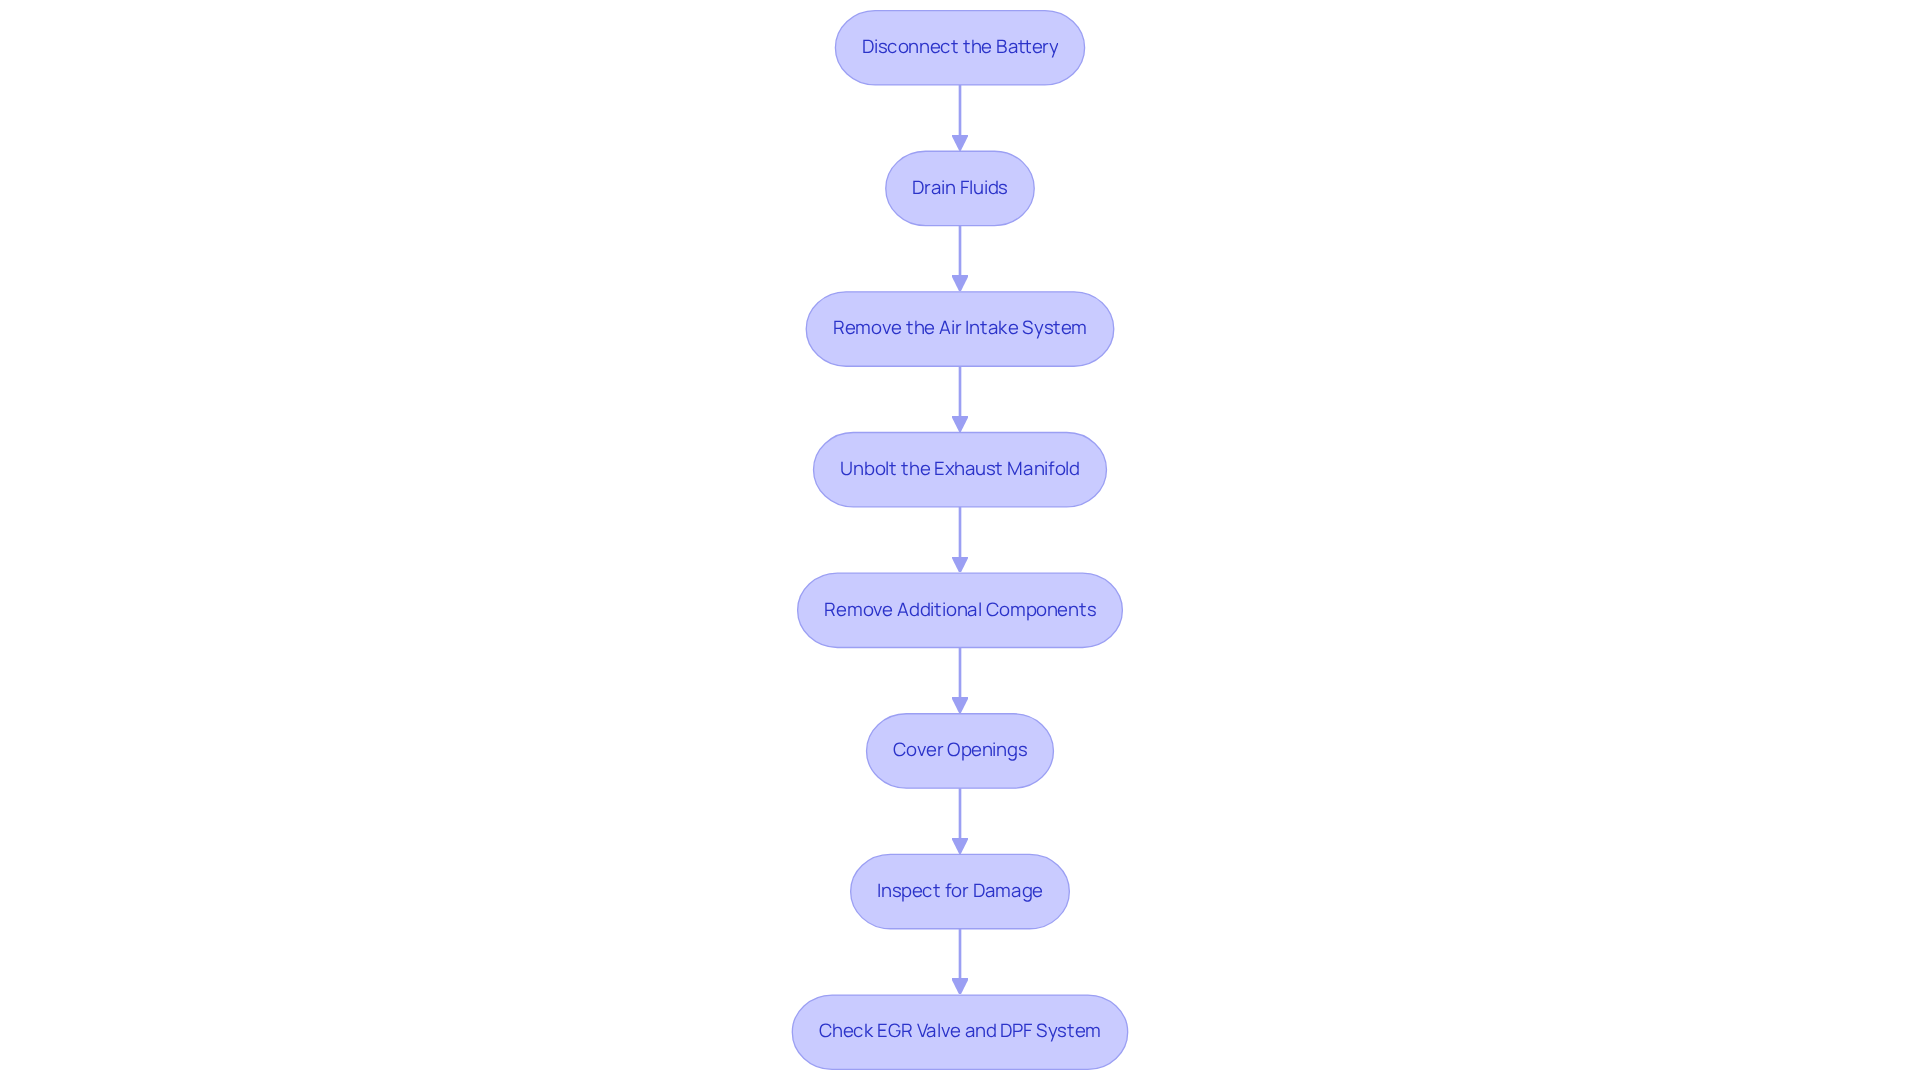
Installing a v8 turbo kit requires careful preparation, beginning with the removal of specific engine components. Follow these detailed steps to ensure a smooth installation process:
- Disconnect the Battery:
Start by disconnecting the negative terminal of the battery; this will help prevent any electrical issues during installation. - Drain Fluids:
Use an oil catch pan to drain the engine oil and coolant. This step is essential to prevent spills and contamination during the setup. - Remove the Air Intake System:
Detach the air filter and intake piping to gain unobstructed access to the engine components. - Unbolt the Exhaust Manifold:
Carefully unbolt the existing exhaust manifold, ensuring that you keep track of all bolts and nuts for reinstallation. - Remove Additional Components:
Depending on your vehicle's configuration, you may need to remove other components such as the radiator, intercooler, or any obstructing hoses to facilitate the turbo installation. - Cover Openings:
Make sure to cover any openings on the inlet and exhaust; this keeps foreign objects from getting in while you work on the turbocharger. - Inspect for Damage:
Before proceeding with the installation, inspect the removed components for any signs of wear or damage. Addressing these issues now can prevent complications later. - Check EGR Valve and DPF System:
It is also advisable to check and clean the EGR Valve and DPF system, as these components can impact turbo performance.
By following these steps, you will effectively prepare your engine for the v8 turbo kit setup, ensuring optimal functionality and durability. Regular upkeep and comprehensive evaluations are essential for a successful turbocharger upgrade. For instance, one case study on cleaning and inspection of turbocharger components found that thorough cleaning can prevent blockages and ensure the longevity of the turbocharger. Additionally, an expert mechanic emphasizes, "I can't emphasize enough how critical it is that the oil supply pipe or hose and oil drain pipe or hose is thoroughly clean, and I mean absolutely thoroughly, 100% clean, did I mention clean?" By adhering to these guidelines, you not only ensure a successful installation but also significantly enhance your vehicle's performance.
Install the Turbo Kit
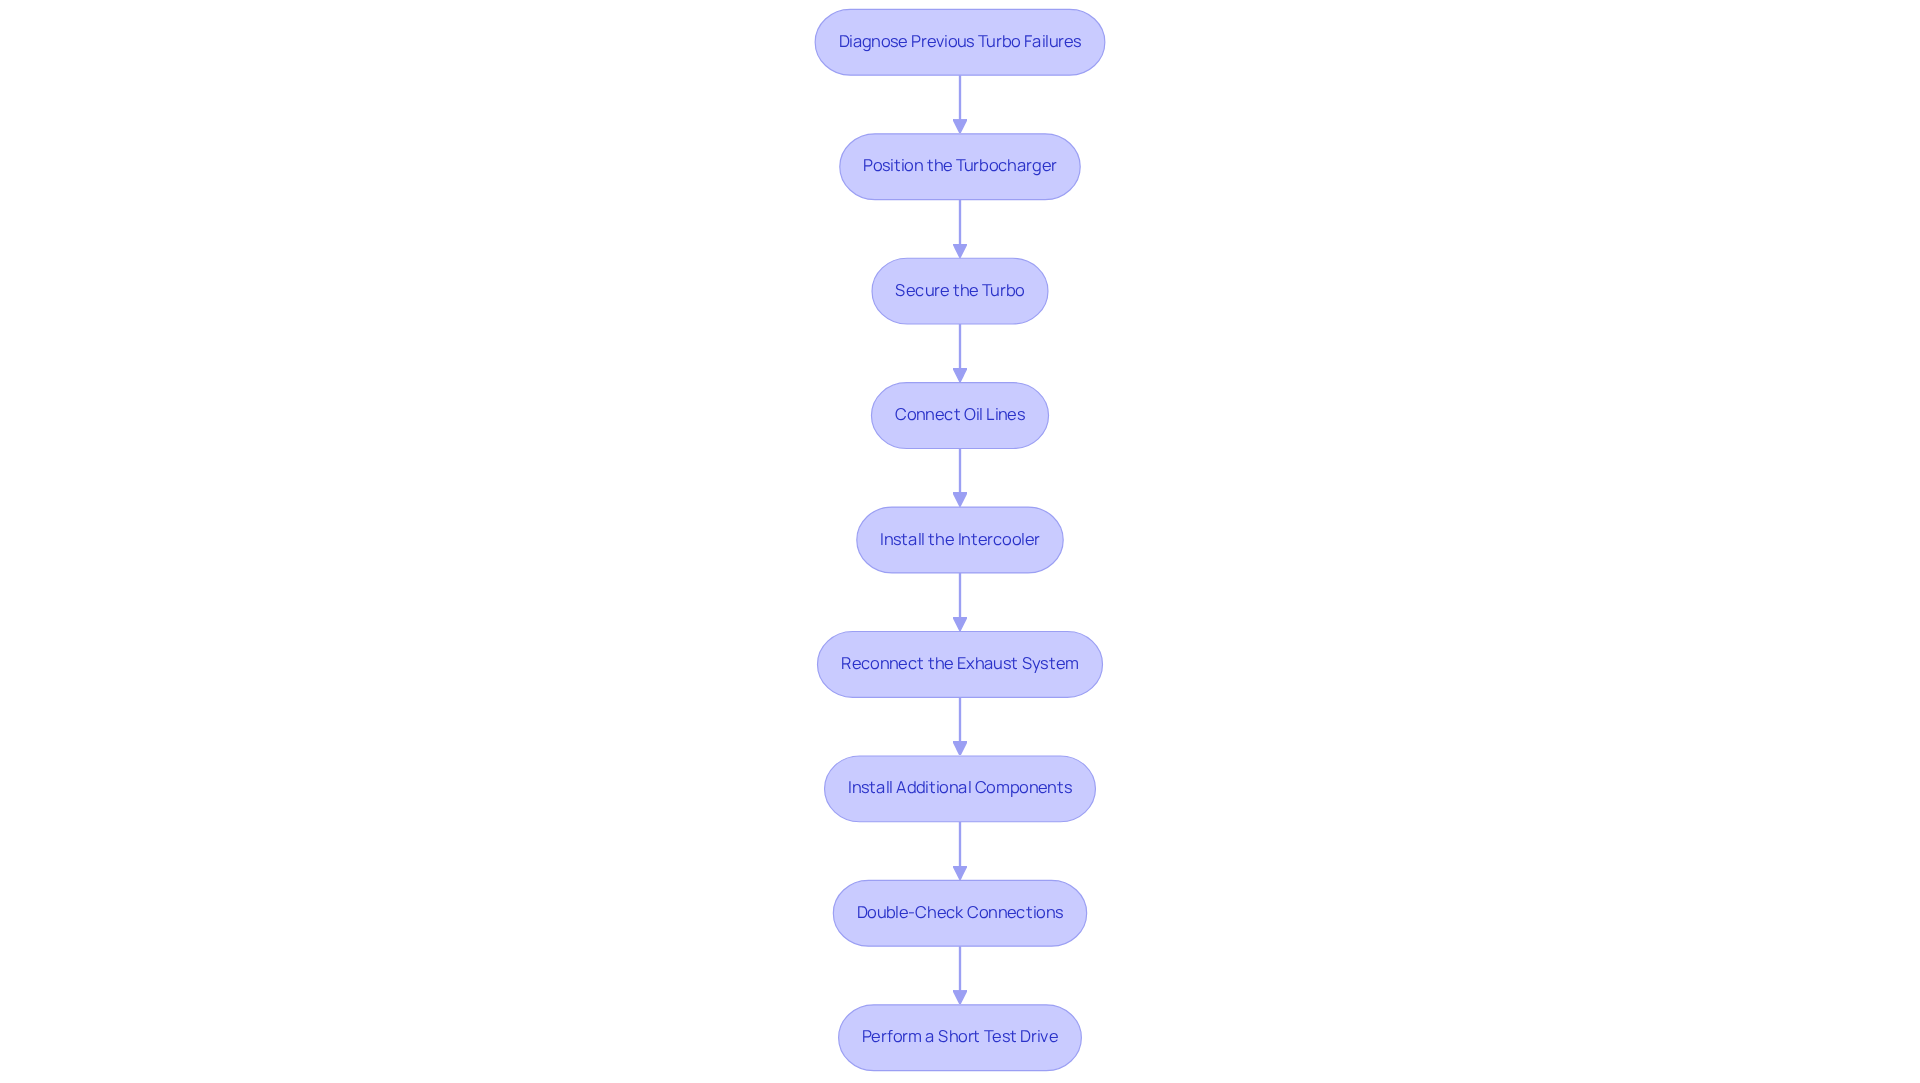
Installing your V8 turbo kit is a critical step that can significantly enhance your vehicle's power and efficiency, but it requires careful attention to detail. Follow these steps for a successful installation:
-
Diagnose Previous Turbo Failures:
- Before you dive in, take a moment to figure out why the last turbo failed - was it oil contamination or a blocked air intake? This step is crucial for a successful installation.
-
Position the Turbocharger:
- Place the turbocharger onto the exhaust manifold, ensuring it aligns with the mounting holes. Use new gaskets to prevent leaks, as proper sealing is essential for optimal performance.
-
Secure the Turbo:
- Bolt the turbocharger to the manifold using the appropriate torque specifications. Refer to your performance kit manual for specific torque values to ensure a secure fit.
-
Connect Oil Lines:
- Attach the oil feed and return lines to the turbo. Ensure that the connections are secure and leak-free to maintain optimal functionality.
-
Install the Intercooler:
- Carefully position the intercooler right in front of the radiator, then connect it to the turbocharger with the piping provided in your kit. This ensures efficient airflow and cooling, which are vital for performance.
-
Reconnect the Exhaust System:
- Reattach the exhaust piping to the turbo, ensuring all connections are secure and leak-free to avoid performance issues.
-
Install Additional Components:
- Reinstall any components that were removed, such as the air intake system, radiator, and any hoses, ensuring everything is in place.
-
Double-Check Connections:
- Before closing the hood, double-check all connections and fittings to ensure everything is secure and properly installed.
-
Perform a Short Test Drive:
- After installation, conduct a short test drive, beginning gently and gradually increasing throttle and load to observe the system's reaction under various conditions.
By following these guidelines meticulously, you’ll ensure your V8 turbo kit is set up for peak performance, unlocking the full potential of your turbocharged V8. Regular upkeep, such as inspecting oil and air filters, is essential for extending the lifespan of your forced induction system and preserving its efficiency. Neglecting these installation steps could lead to costly repairs and diminished performance, so take the time to do it right.
Tune the Engine for Optimal Performance
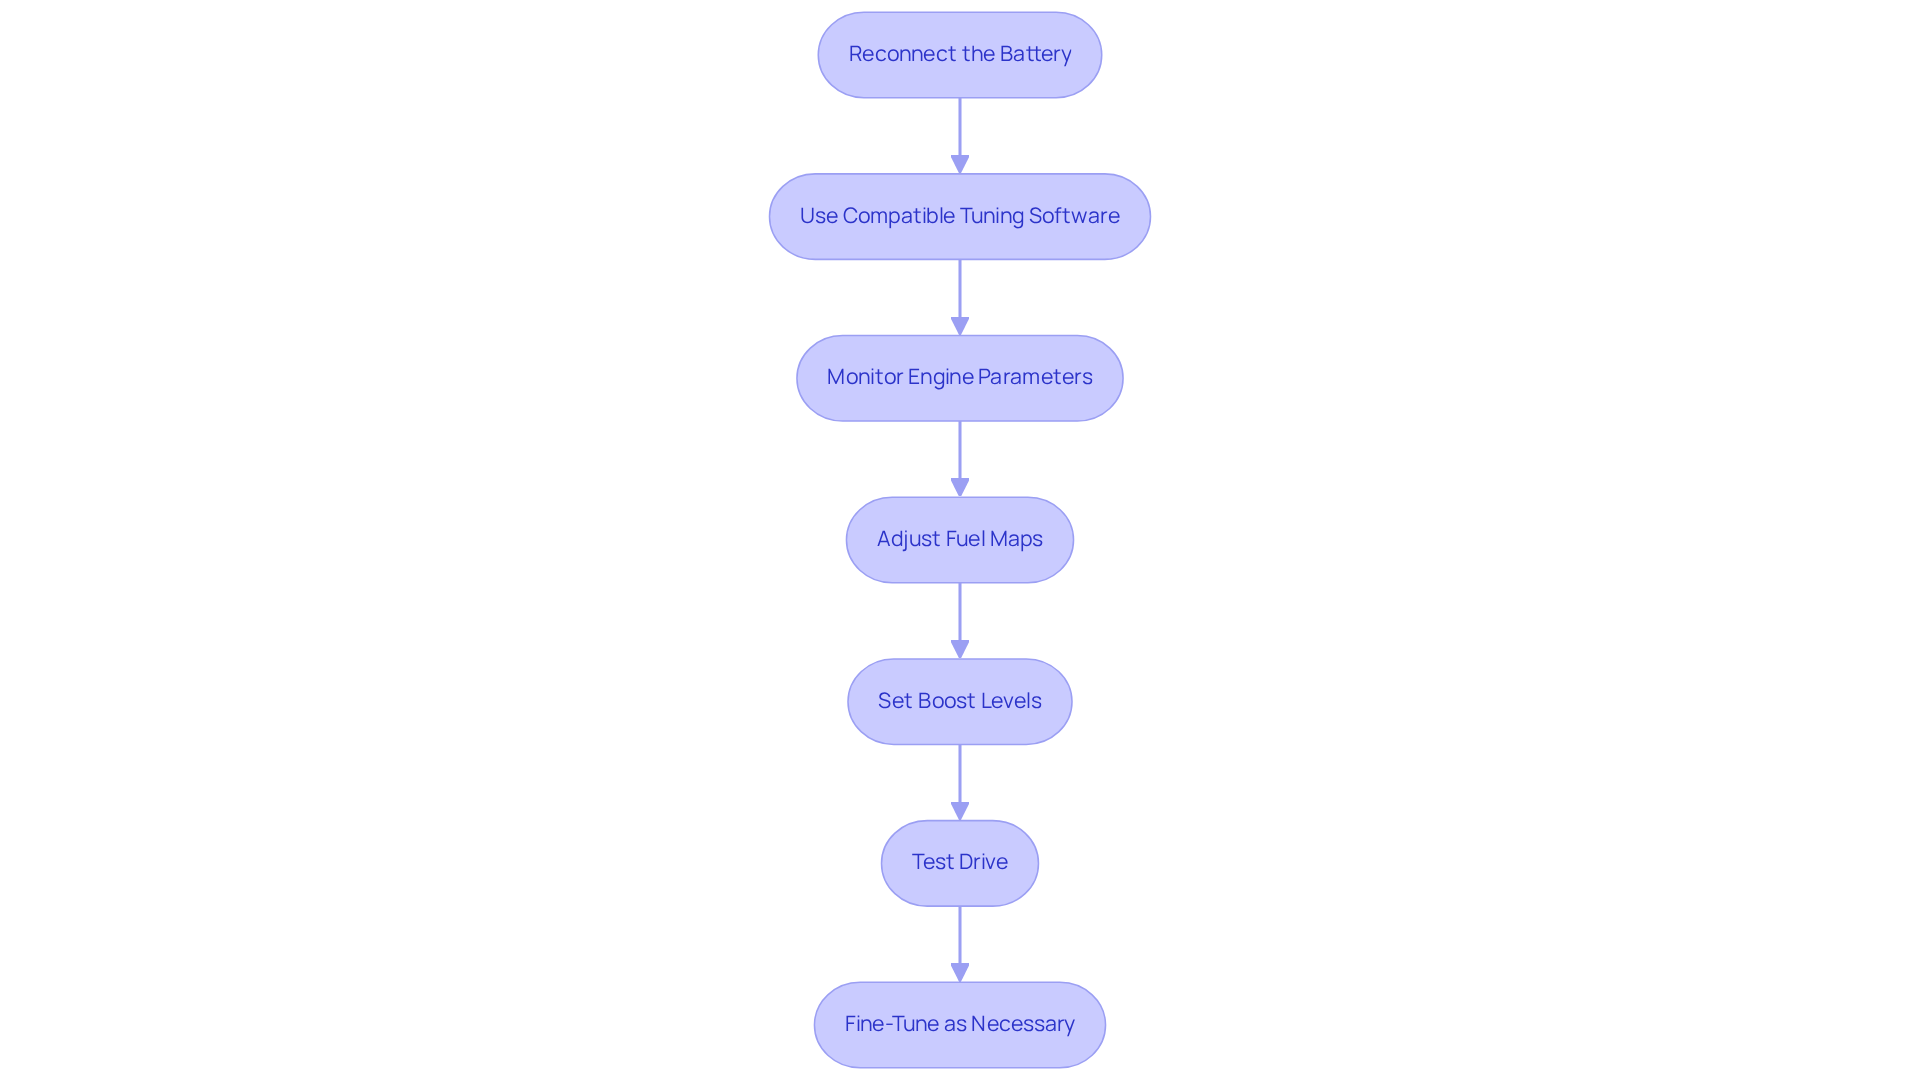
Installing a V8 performance kit is just the beginning; tuning is where the real magic happens to unleash your engine's potential. Here’s a detailed guide on how to effectively tune your engine:
- Reconnect the Battery:
First, reconnect the battery to power the ECU and diagnostic tools, setting the stage for a successful tuning process. - Use Compatible Tuning Software:
Select tuning software that is compatible with your vehicle’s ECU. This software will enable you to adjust critical parameters such as fuel maps, ignition timing, and boost levels. - Monitor Engine Parameters:
Utilize a diagnostic tool to keep an eye on vital engine parameters, including air-fuel ratio (AFR), boost pressure, and engine temperature throughout the tuning process. - Adjust Fuel Maps:
Modify the fuel maps to ensure the engine receives the appropriate amount of fuel to match the increased air intake from the turbo. This modification is essential to avoid operating with insufficient fuel, which can result in damage to the motor. Upgraded fuel pumps and high-flow fuel injectors from Mace Engineering Group can significantly enhance fuel delivery under high boost conditions. - Set Boost Levels:
Carefully adjust the boost levels according to your turbo kit specifications. It’s vital to ensure that the boost does not exceed the engine’s safe limits to avoid potential damage. - Test Drive:
After tuning, take the vehicle for a test drive to verify that everything is functioning correctly. Keep an ear out for any strange noises or issues while driving. - Fine-Tune as Necessary:
Based on your test drive observations, make any necessary adjustments to the tuning to further optimize performance. This iterative process is key to achieving the best results.
Proper tuning is not solely about boosting horsepower; it guarantees that the performance kit functions efficiently and dependably. Case studies have demonstrated that vehicles with enhanced fuel systems, exhaust systems, and intercoolers experience notable performance gains, emphasizing the significance of supporting modifications following a turbocharger installation. For instance, a larger intercooler can help maintain lower intake air temperatures, which is critical for preventing engine detonation and maximizing power output.
To truly unlock your vehicle's potential, make tuning a priority after installing your V8 turbo kit. By following these steps and considering supporting modifications, such as those offered by Mace Engineering Group, including exhaust systems and ignition components, you can ensure a reliable and high-performance driving experience.
Troubleshoot Common Installation Issues
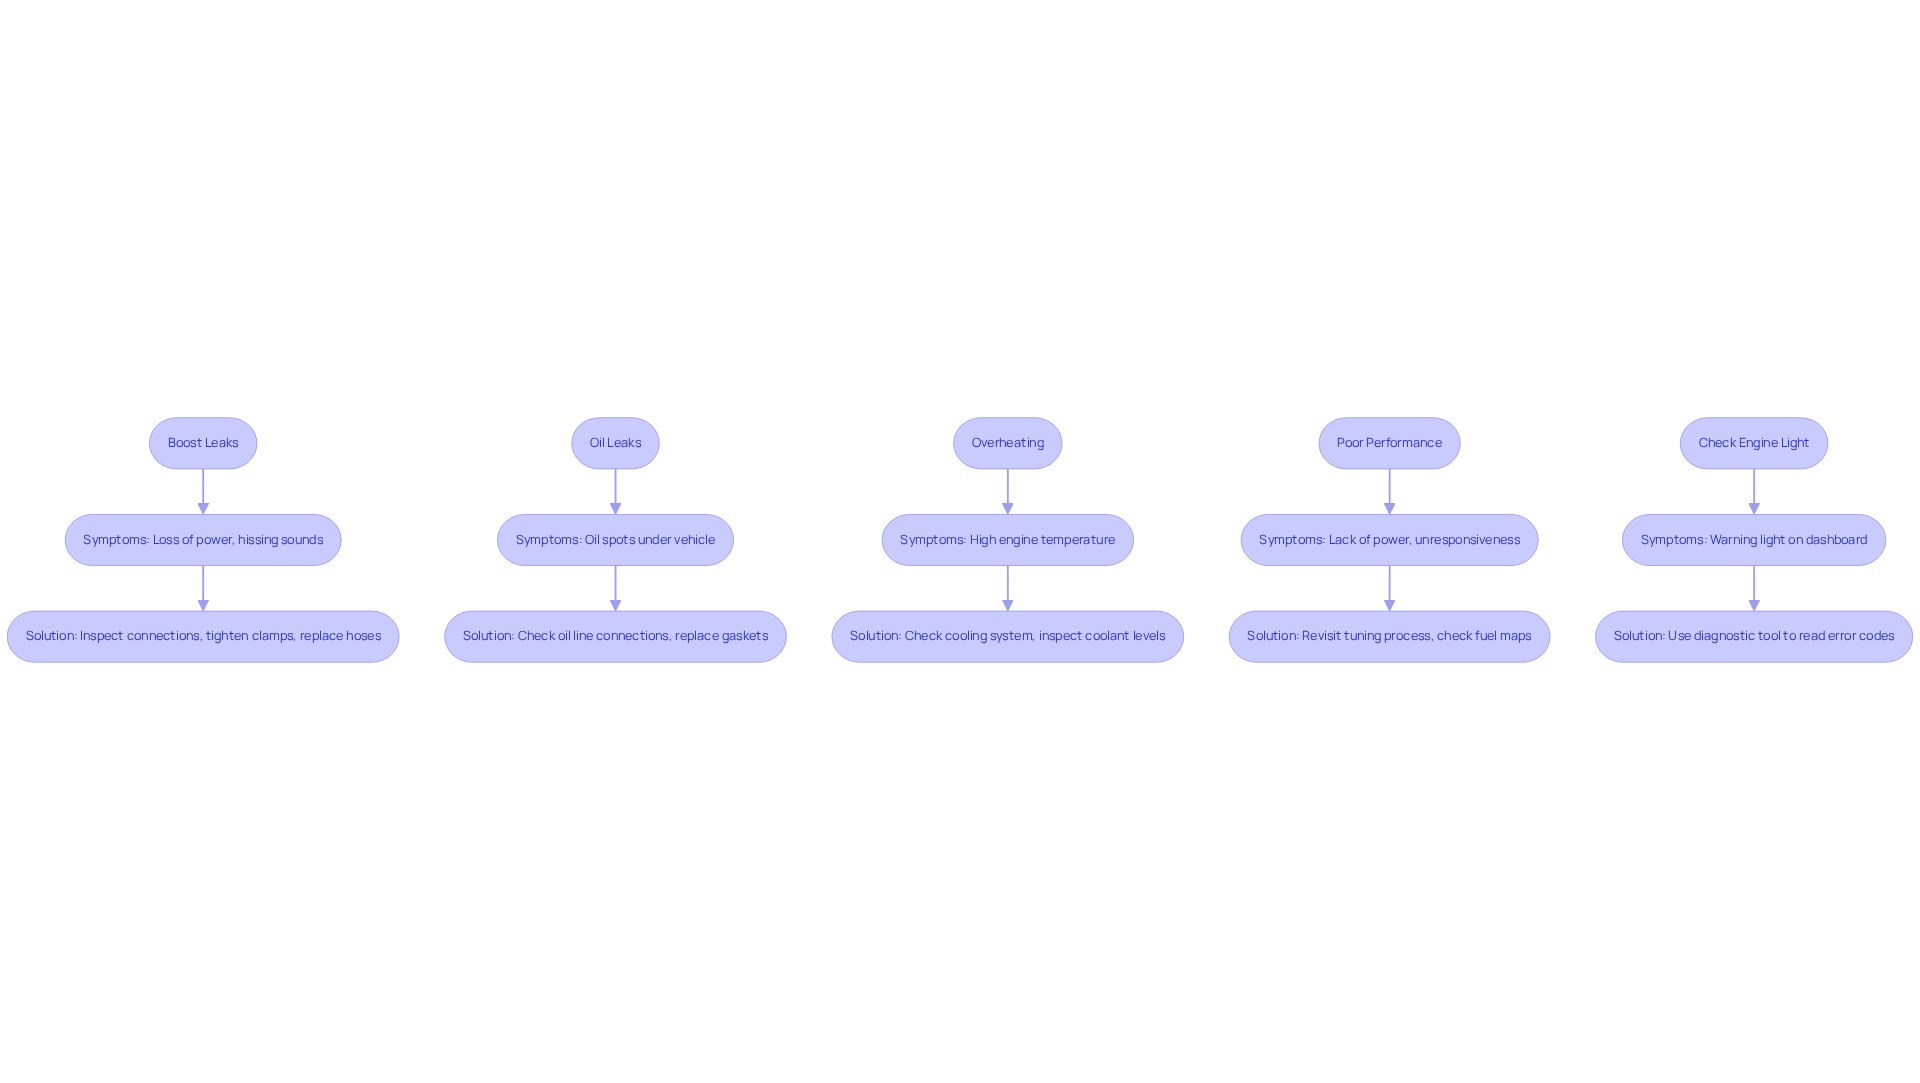
Even the most prepared enthusiasts can face unexpected challenges during installation. Here are some common problems, their symptoms, and effective solutions:
-
Boost Leaks:
- Symptoms: Loss of power and hissing sounds during acceleration.
- Solution: Inspect all connections and hoses for leaks. Tighten clamps and replace any damaged hoses. Regular maintenance of intercooler pipes and clamps is crucial to prevent these leaks. A boost leak can lead to long-term engine damage if left unchecked and can cause excessive fuel burning, resulting in black smoke from the exhaust.
-
Oil Leaks:
- Symptoms: Oil spots under the vehicle, often indicating a serious issue.
- Solution: Check all oil line connections and gaskets. Ensure they are secure and replace any faulty gaskets. Proper installation techniques, including using high-quality seals, can significantly reduce the risk of oil leaks. Remember, a single instance of oil deprivation or contamination can ruin the turbocharger in seconds.
-
Overheating:
- Symptoms: High engine temperature readings, which can lead to severe engine damage if not addressed.
- Solution: Ensure the cooling system is functioning properly. Check coolant levels and inspect for blockages in the radiator. Upgrading to a more efficient intercooler can also help manage temperatures effectively.
-
Poor Performance:
- Symptoms: Lack of power or responsiveness, often felt during acceleration.
- Solution: Revisit the tuning process. Ensure that fuel maps and boost levels are correctly set. A structured diagnostic method is crucial for resolving performance issues, as many enthusiasts incorrectly attribute failures to hardware instead of tuning mistakes.
-
Check Engine Light:
- Symptoms: Warning light illuminated on the dashboard, indicating potential issues.
- Solution: Use a diagnostic tool to read error codes. Address any issues indicated by the codes, such as boost underboost or fuel trim problems, which can often be traced back to errors during setup.
Addressing these issues promptly not only safeguards your investment but also maximizes your vehicle's performance potential. Regular inspections and maintenance, along with the use of high-quality components, will help prevent future problems and enhance the longevity of your turbocharged system.
Conclusion
Installing a V8 turbo kit is not just a task; it's a pivotal step that can redefine your vehicle's performance. This guide outlines the essential steps to ensure a successful installation, from gathering the right tools to the intricate process of tuning. Each phase is crucial, ensuring that the turbocharger operates efficiently and reliably, ultimately unlocking the full potential of your engine.
Key insights include the importance of meticulous preparation, such as:
- Removing existing engine components
- Ensuring all connections are secure
The tuning process is equally vital, as it fine-tunes the engine's performance to match the enhancements provided by the turbo kit. Installation challenges can lead to costly repairs if not addressed early, so being proactive can ensure a smooth driving experience.
Taking on the installation of a V8 turbo kit not only boosts your vehicle's performance but also enhances your grasp of automotive mechanics. By following the outlined steps and prioritizing regular maintenance, enthusiasts can enjoy a powerful and reliable driving experience. If you're ready to elevate your vehicle's performance, Mace Engineering Group provides the products and expertise you need to achieve optimal performance on New Zealand roads.
Frequently Asked Questions
What tools are essential for a successful automotive performance upgrade?
Essential tools include a comprehensive socket set (both metric and imperial), a torque wrench, a one-metre-long 1/2in breaker bar, flathead and Phillips screwdrivers, pliers and wire cutters, an oil catch pan, a coolant drain pan, line tools, safety goggles, and gloves.
What materials are required for installing a turbo kit?
Required materials include the turbo kit (turbocharger, manifold, and intercooler), compatible gaskets, oil and coolant for refilling, hose clamps and fittings, and electrical connectors as per the performance kit's specifications.
What is the first step in preparing for the installation of a V8 turbo kit?
The first step is to disconnect the negative terminal of the battery to prevent any electrical issues during installation.
How should fluids be managed during the installation process?
Use an oil catch pan to drain the engine oil and coolant to prevent spills and contamination.
What components need to be removed to install the turbo kit?
You need to remove the air intake system, unbolt the exhaust manifold, and potentially remove other components like the radiator, intercooler, or obstructing hoses.
Why is it important to cover openings during the installation?
Covering openings on the inlet and exhaust prevents foreign objects from entering while you work on the turbocharger.
What should be inspected before proceeding with the turbo kit installation?
Inspect the removed components for signs of wear or damage, and check and clean the EGR Valve and DPF system, as these can impact turbo performance.
What is the significance of thorough cleaning during the installation process?
Thorough cleaning of the oil supply and drain pipes is critical to prevent blockages and ensure the longevity of the turbocharger.
